Create a Label Manager custom field
‘Label Manager Custom fields are not supported inside team-managed projects in Jira. Use company managed projects instead.
Features of Label Manager specific fields that are not supported on Jira native ‘Labels’ field.
Activate coloring to use labels as checklists by allowing users to assign issue specific traffic light colors to them.
Select 'Customize labels for this project' to manage predefined labels for this project independent from other projects.
Allow project admins to manage available label items for their project independent from other projects or Jira administrator’s help.
Label Manager custom fields can be created like Jira native custom fields
As Jira Administrator: Settings → Issues → Custom fields (Side-navigation) → ‘Create custom field’ Button
Select ‘All’ → Search “Label” → Select “Label Manager for Jira”
Click Next
Enter a Name and Description and click Create
Optional: Associate the new created field with screens
Label Manager Custom Fields behave like normal custom fields and need to be put on the correct screens to appear in projects.
With Project Labels, we aim to make using labels on your Jira Cloud instance much easier by giving every team member a place to manage the labels used in their project.
Working with the Project Labels app is done from the directly from your project. Once the app has been installed, a new menu item called Label Manager will appear in every project. Click on it to get to the Label Manager.
Selecting Label Color Settings
Just like other settings - you can select the ‘Label Color Settings' in the global administrations page for all projects or decide to use projects specific ‘Label Color Settings' in the project administrations page.
You can choose between two Label Color Settings Options
Label Specific Color
Issue Specific Traffic-Light Label Color
Option 1: Label Specific Color (default)
Label Specific Color is enabled by default.
Also new created Label have by default the color ‘grey-light’.
Label specific color means, that just like Epics, label will have a predefined color.
Again you can define that color globally for the label or decide to use your own colors within your project.
Colors can indicate labels with higher priority, or whatever you like those colors to mean within your Jira instance.
Once ‘Label Secific Color’ is selected in ‘3. Label Color Settings'. The Action ‘Change Color’ appears in the label rows.
Just select the color you like the label to have and click on Submit. We will likely add more colors in the future.
Already assigned labels on issues will get the color updated based on selection.
Checking Label Use in Your Project
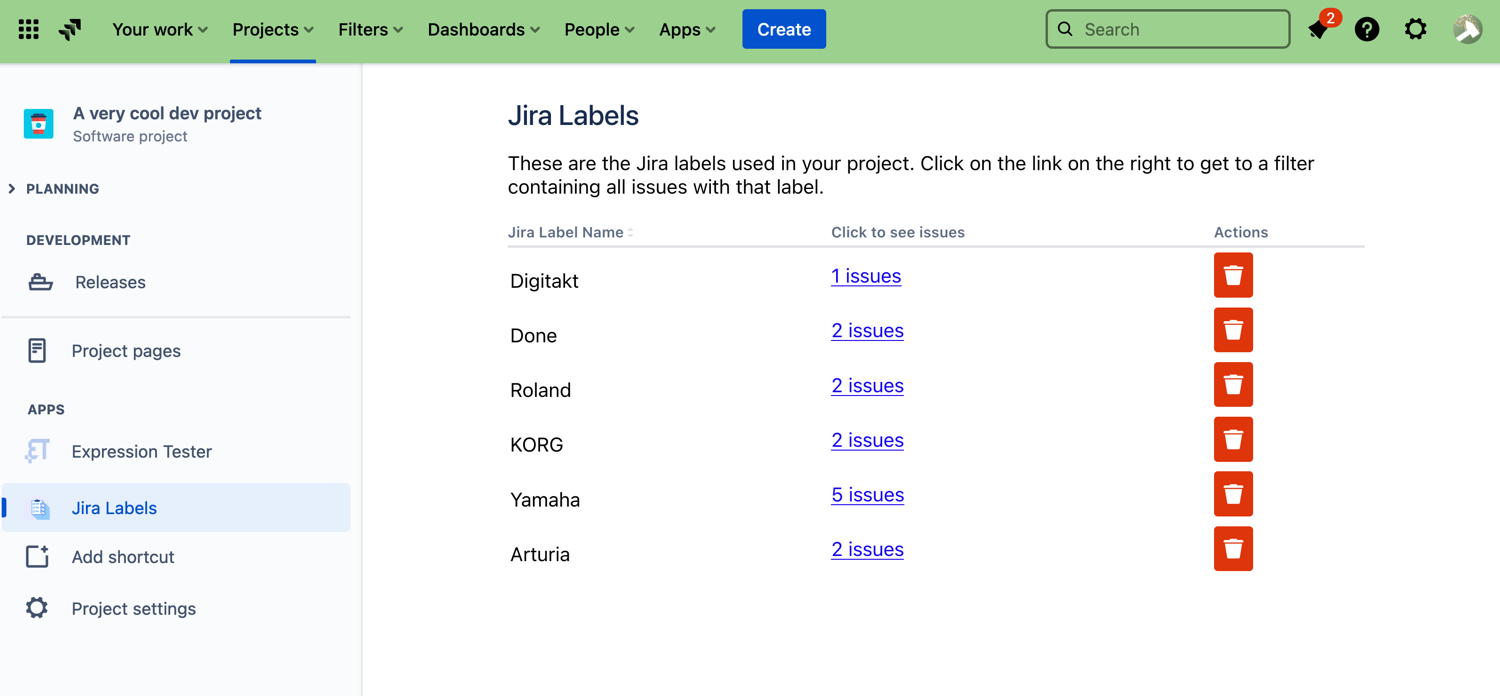
Go to your project and open the Label Manager from the sidebar. You should see something like this:
This is a list of all the Jira labels used in your project. The second column shows you how many times a label has been used. Clicking on that link opens a new tab with a filter that shows all issues with that label in your project.
Renaming a Jira Label
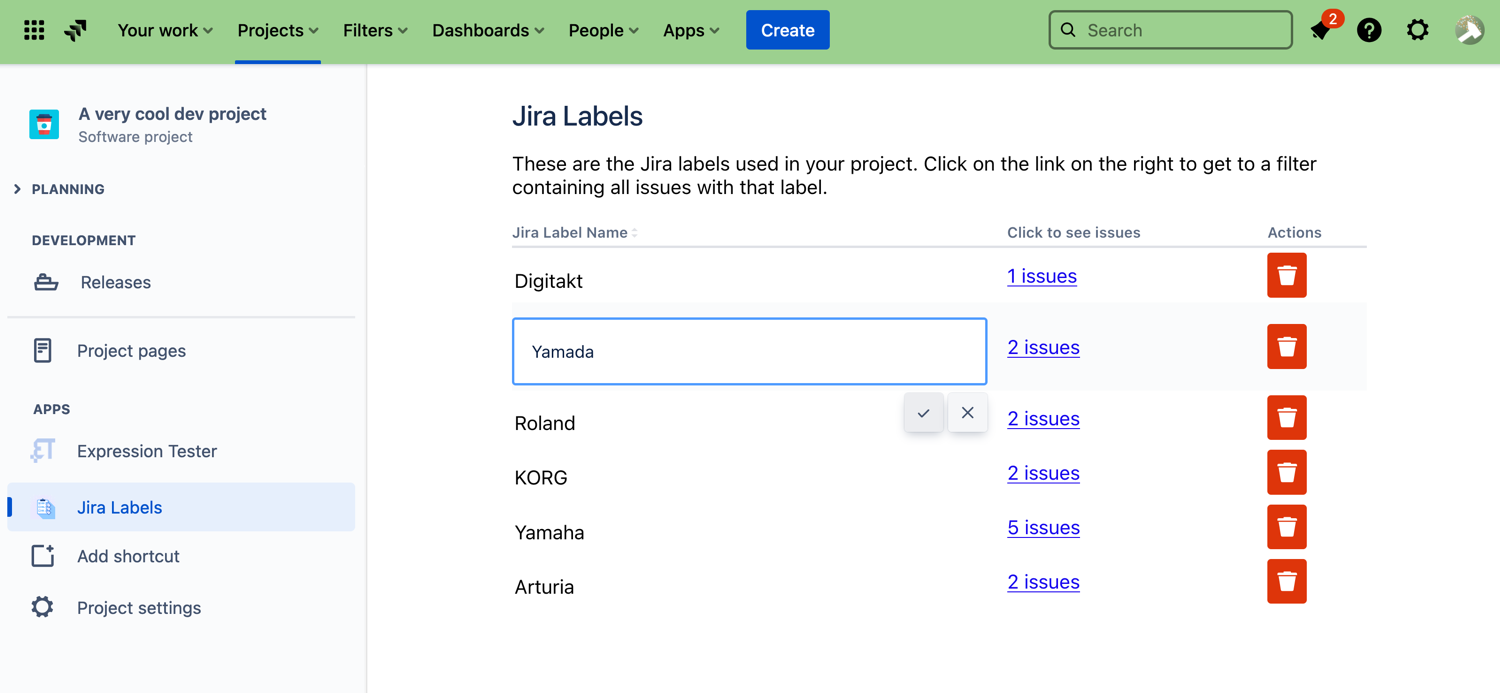
Renaming a label is done in place; just click on the label you want to rename, make a change and then click on the checkmark to the right of the input box. All issues with that label will be updated to use the new label name.
Using Colored Label Manager for Jira, you can edit the label name as needed. The renaming will be reflected in all issues where the label was used.
To rename labels :
Go to your project
Open the Project labels from the left sidebar.
Click on the label and rename it
To rename labels in a project, go to Project → Manage Labels instead.
Please note: If you are in global mode, administrative actions (rename, delete etc.) will affect all projects. If you do not want this, use per project label management.
Merging Jira Labels
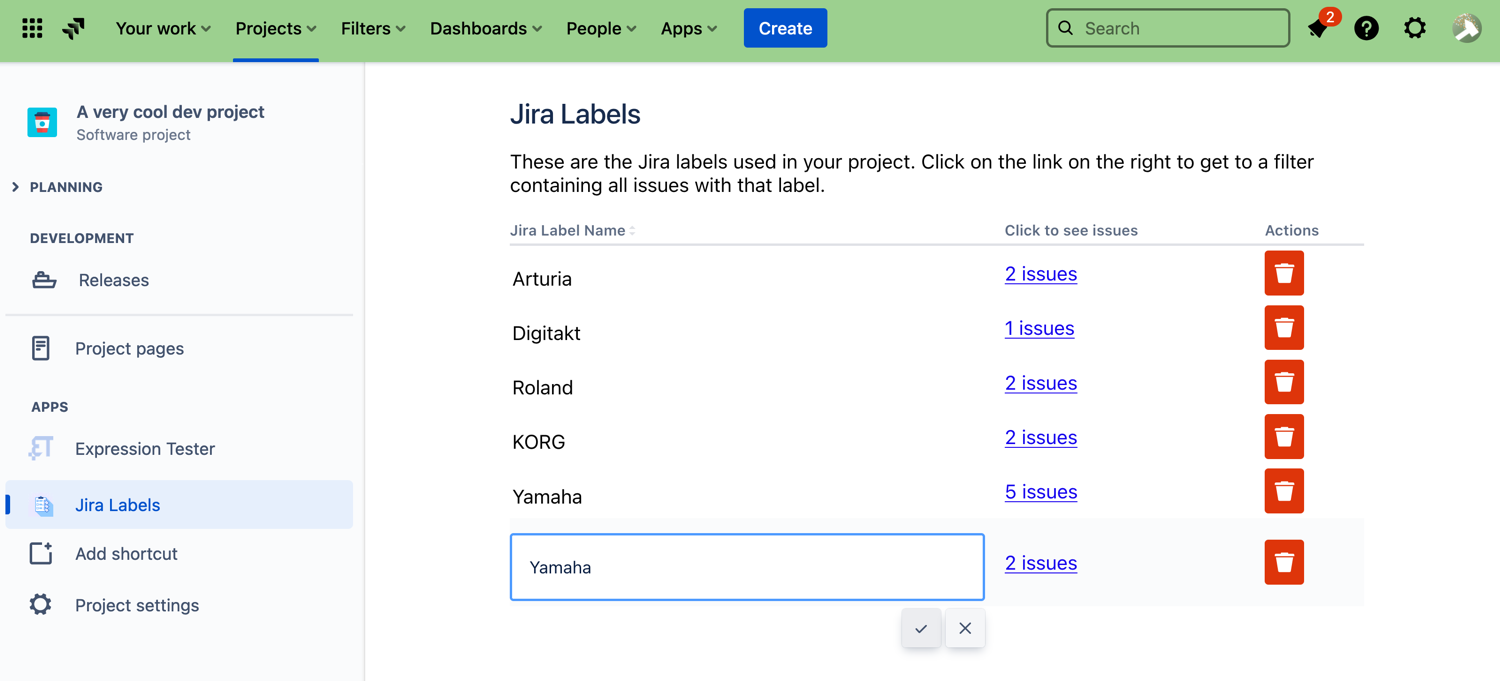
Sometimes, you will need to merge two labels. Typically, this happens when you notice different spellings for what should be the same label, like in the screenshot below:
Dealing with this situation is really easy with Project Labels: Simply rename the unwanted spellings to the spelling you would like to keep.
Deleting a Jira Label
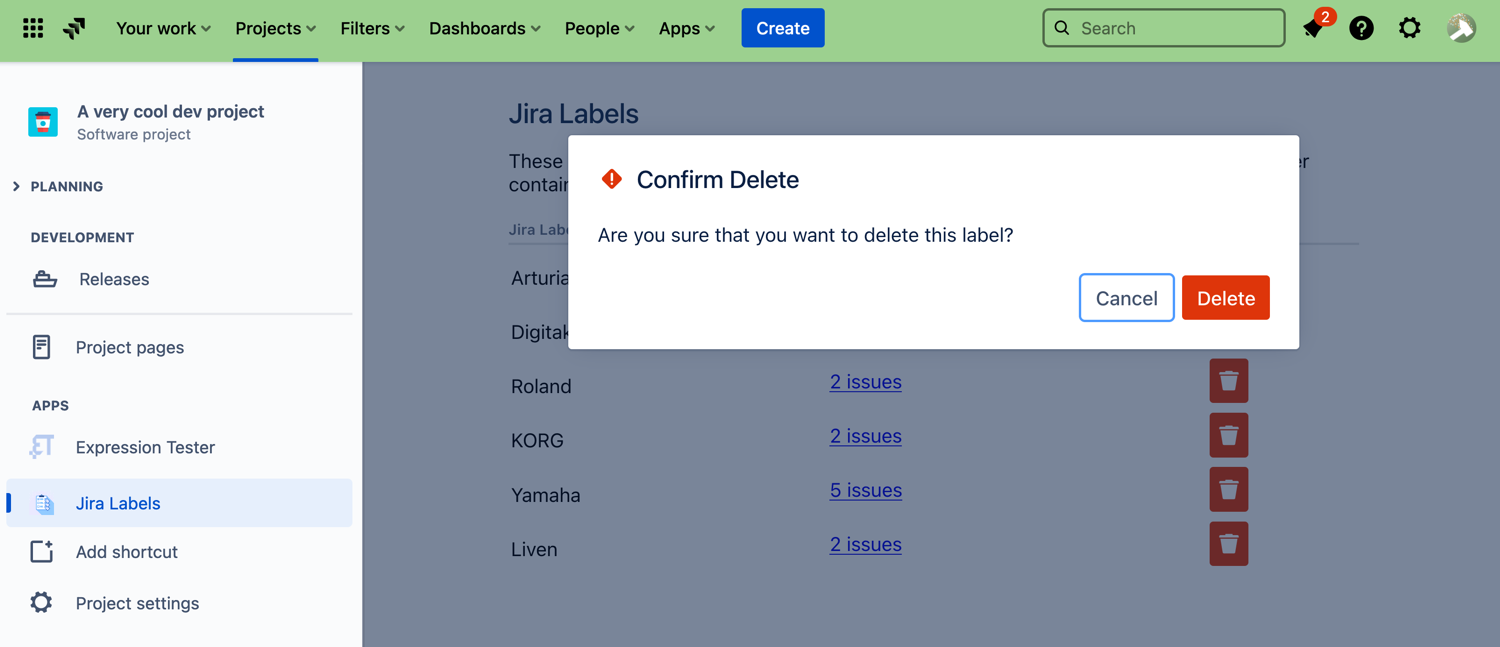
Deleting a label is just as easy as you would expect. Simply click the trashcan icon next to the label you want to delete. You will then be asked to confirm that you want the label deleted:
Click Delete to remove the label from all issues in your current project.
Once a label has been deleted, it will no longer be suggested when adding a label unless it is also in use in another project.
You can get rid of labels that are not needed anymore in your Jira environment. If you just want to rename or merge the duplicate labels, please refer to this page Rename labels in Jira instead.
To delete a label globally:
Go to Apps → Manage Labels
Find the label and click Delete. A confirm window will open, click OK.
If you have a label that is used in too many issues, this operation might take a while.
To delete a label only in a project, go to Project → Manage Labels instead.
Delete a label in Jira
Sometimes deleted labels are still suggested in label field, please refer to Known Issues & limitations for workaround.


